EZ Outdoor Patio Furniture Refresh – DIY
Does your outdoor patio area in need of a spring refresh? It can be hard to relax on dingy old patio furniture – but what to do if you don’t want to buy a whole new set? Ellen Zetmeir has a quick fix to breathe new life into your patio furniture, and this DIY project is not only cheap, but totally EZ!
Why Paint Your Patio Furniture
A little paint goes a long way whether you’re upgrading a set you purchased on Facebook Marketplace or you just want to refresh your own outdoor seating. Any outdoor furniture you already own will take a beating out in the elements, but a fresh coat of paint can usually hide any blemishes or scrapes your furniture has endured the previous year. Plus, a new coat of paint gives options to better match your outdoor landscaping or your home’s exterior – or choose a fun, spring color for a mood reset.
The best part about this DIY? It doesn’t take much money, skill, or time to accomplish. Easy and cheap, this project should only take one afternoon – or a weekend if you have several furniture pieces.
 Supplies Needed for Spray-painting Outdoor Metal Furniture

- Drop Cloth (or save money by breaking down old cardboard boxes and flattening them or using a large sheet of plastic)
- Stiff Wire Brush
- Scrub brush and cleaning rags
- Cleaner – some invested homeowners might use metal cleaner or TSP (trisodium phosphate) but if you’re looking to save money, mild dish soap will work just fine
- Primer and Paint – Primer is essential so that any imperfections or missed spots will blend in much better. Some homeowners may prefer separate primer and paint, but you can absolutely purchase two-in-ones that work fabulously, especially if you plan to update your furniture each year anyway.
- Spray Paint Handles or Grips – (optional) For larger projects, grips will keep your hands from getting sore. Or, if you tend to have shakier hands, these handles can help provide a more even spray coat. Just pick up a grip or spray paint handle at your local hardware store!
How To Prep Outdoor Furniture for Painting
You may spend more time prepping than painting – and that’s because this is the most important step. A good, clean surface ensures that the paint will bond well, dry smoothly, and last for as long as possible.
- Wire Brushing. Use this tool to remove chipping paint and any rust build up; it can reach cracks and crevices much better than sandpaper can. Be thorough here – any flaking, chipping, rusted part needs to come off so pay special attention to corners, tight spots, and the underside of the furniture too.
- Deep Cleaning. After all the flaking and chipping parts have been removed, give the metal furniture a good scrub. Grease, dirt and debris be gone! Here’s where some homeowners might use TSP but mild dish soap will work just fine. Use those rags and the scrub brush to really clean the furniture well. If you happen to have a power washer handy, by all means use it! Then, and very importantly, thoroughly dry the pieces after washing – especially if they were already a bit rusty.

When to Paint Outdoor Furniture
After all your prep work, it’s exciting to get to the painting part, but first! A note about weather: never spray paint in full sun or on a windy day. Full, direct sunlight can heat the paint too quickly – causing it to crack and peel when it dries. Wind, on the other hand, will help you paint not just the furniture but everything and everyone nearby; spray paint can drift several feet even on calm-weathered days. Obviously, don’t spray paint indoors, and for larger furniture pieces, it’s unwise to paint in the garage either.
Ideal spray-painting weather is a cloudy day (for example, the day AFTER it has rained so there’s less pollen in the air) with no expected precipitation so that the pieces will have plenty of time to dry in shady conditions.
 How to Paint Outdoor Furniture

- Remove anything you don’t want to get paint on far away from your spray painting project – remember, the paint can drift and will color the side of your house, your car, a bike, a person, a dog, etc.
- Shake the can well – for a full minute before beginning, and then for about 20-30 seconds every few minutes to keep the paint mixed and give you an even color coat.
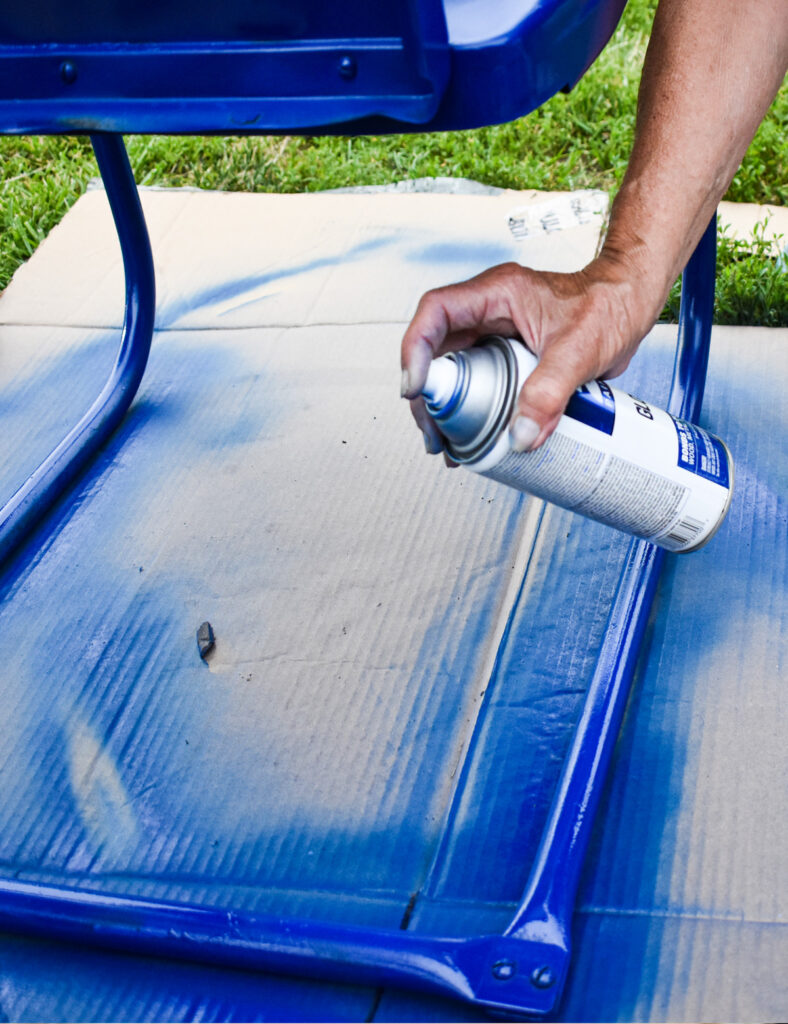
- While painting, “sweep” past the edges – that is, start spraying before the can is over the furniture piece. Also, spray in side-to-side or up-and-down motions; consistency is the key to a smooth, finished look.
- Don’t overpaint the first paint layer; “Full coverage” will drip and leave runny marks. Thin layers are KEY.
- Spray from about 8-12 inches away to avoid overpainting; the goal is several light, even coats – NOT a fully drenched-in-paint patio piece.
- Wait for the coats to fully dry between painting layers.
- Spray from multiple angles to fully cover the piece – even the bottom. Experienced homeowners recommend painting from the top, then painting the sides one at a time, spraying the piece from the bottom (aka upside down), and finally one last top coat.
- Wait at least 48 hours after painting for the pieces to dry fully before putting cushions back on.
EZ Spring Curb Appeal
Interested in other easy, affordable ways to upgrade your home’s look this season? Check out Ellen’s tips for Easy Spring Curb Appeal or her How to Renovate Your Bedroom For Less blogs!